Installing a node
Adding community nodes to your Node Library
You can download nodes created by other people and add them to your Node Library. These include nodes found in the Node Gallery, subcompositions found in the Composition Gallery, and fragment shaders in Interactive Shader Format (ISF).
Installing a node the quick way
Changed in Vuo 2.0You no longer have to relaunch Vuo after installing nodes.
If the node to install is a .vuonode file,
you can just double-click on the file to install it. The node
gets installed in the User Library folder (explained in the
next section). You can begin using the node right away,
without having to relaunch Vuo.
Making a node available to all compositions
Depending on who should have access to the node — which compositions, and which user accounts on the computer — there are different places to install the node.
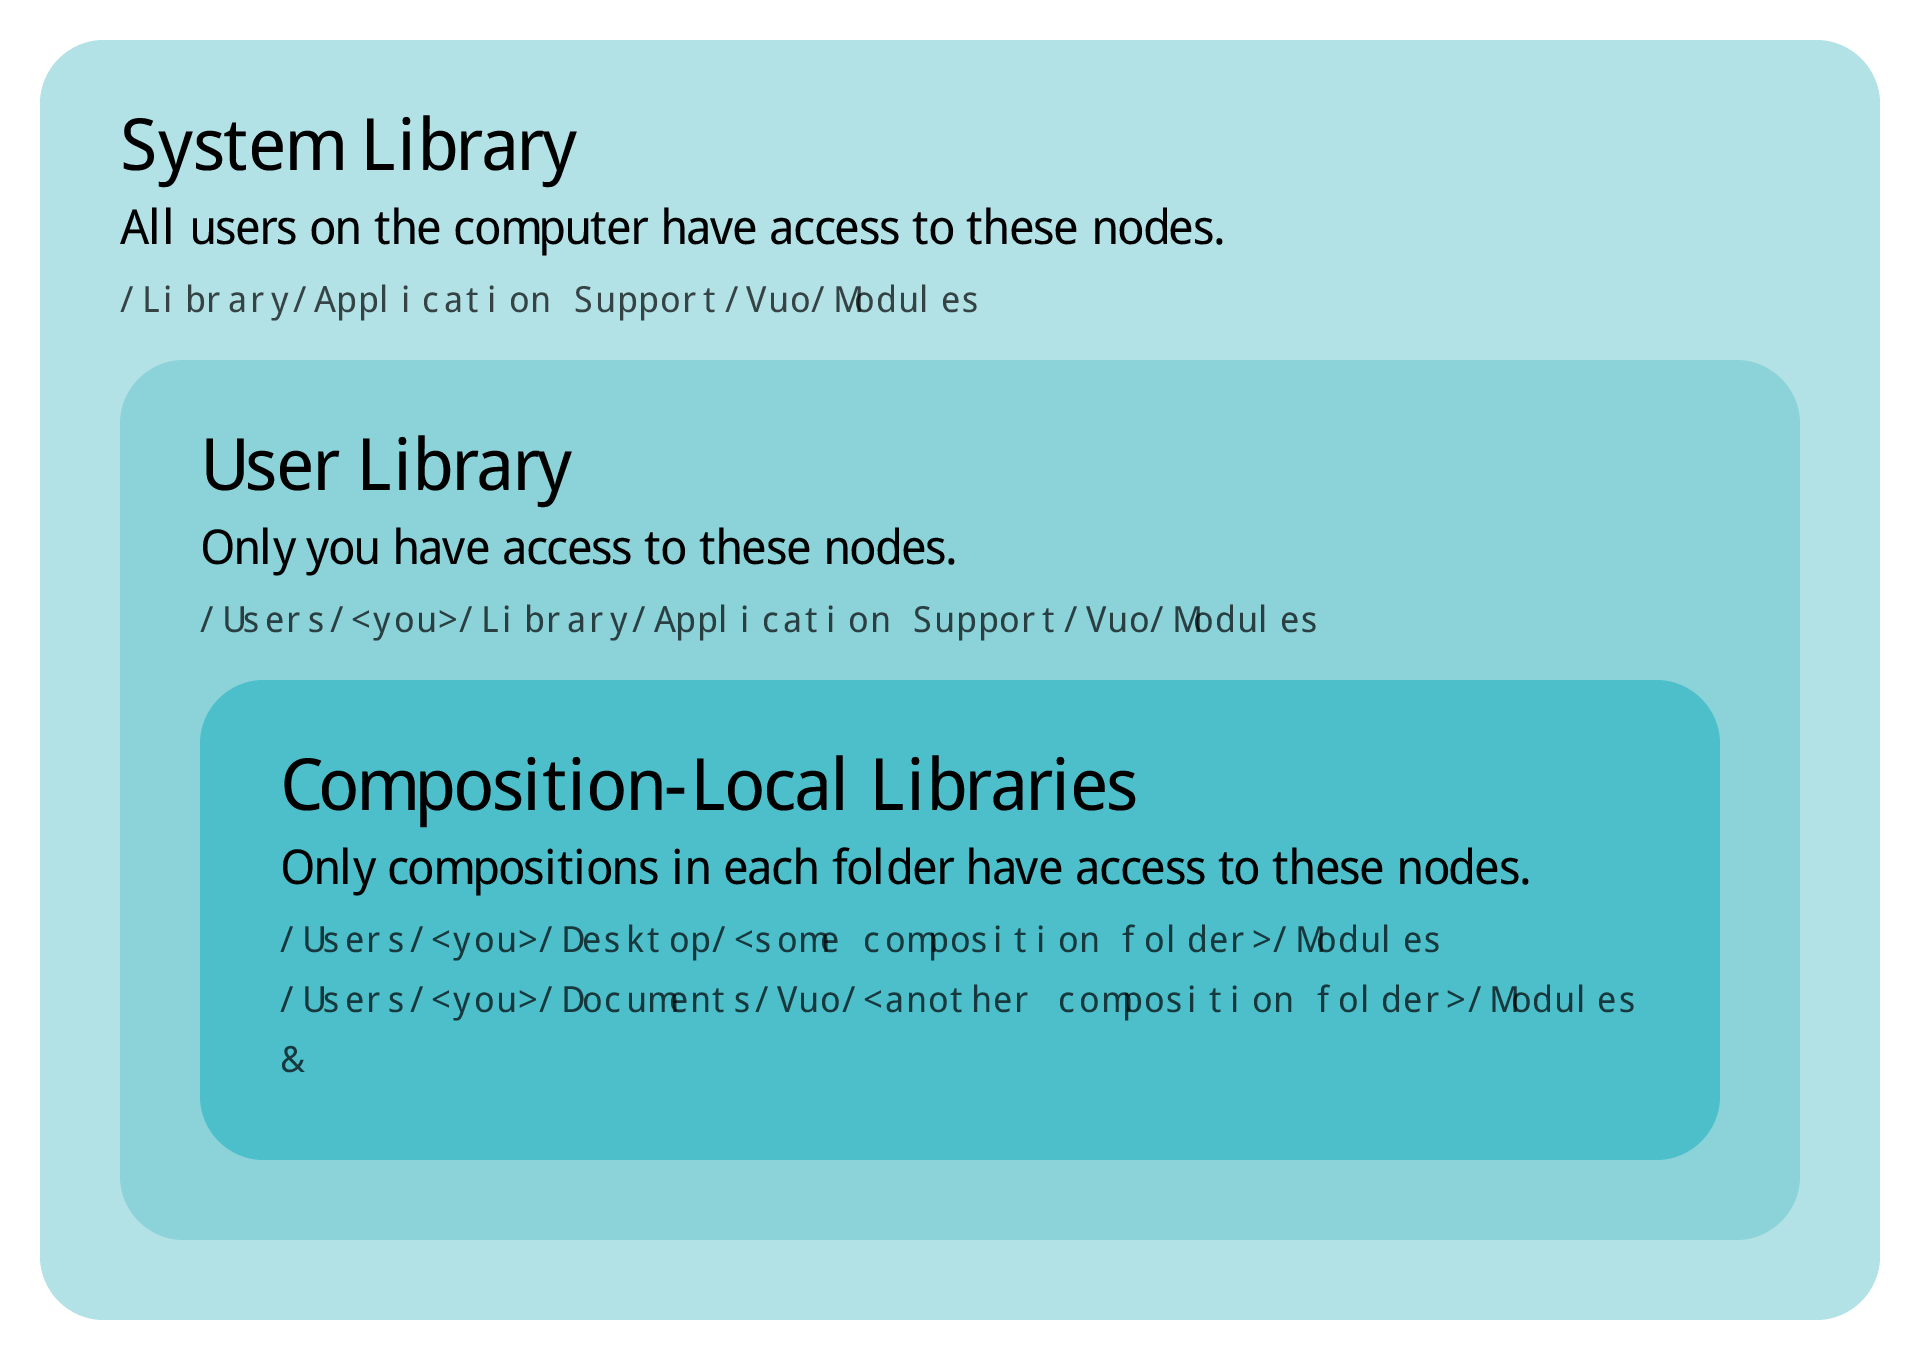
If the node is one that you expect to use in many compositions, you can install it in the User Library folder or the System Library folder. To access these folders, go to:
Or in Finder: Hold down the Option key and select the menu option. From there, go to Library/Application Support/Vuo/Modules.
Or in Finder: In the top-level folder on your hard drive, go to Library/Application Support/Vuo/Modules.
You’ll typically want to choose the User Library folder, since yours will be the only user account on your computer that needs access to the node. Use the System Library folder only if you have administrative access and you want all users on the computer to have access to the node.
To install the node, just place the node file in the User Library or System Library folder. If Vuo is running, it will automatically detect the file, and the node will appear in the Node Library momentarily. Otherwise, the node will appear in the Node Library the next time you launch Vuo.
Making a node available to one or a few compositions
New in Vuo 2.0
While some nodes are generally useful, others are more specialized. They may only make sense within the context of a certain composition. Thus, you may not want them to appear in your Node Library when you’re working on unrelated compositions.
You can make a node available only to selected compositions by
installing it in a
Composition-Local Library.
For example, let’s say you have a composition called
Reptiles.vuo saved to your Desktop. You
have a subcomposition called
me.crocodile.vuo and a node called
me.tortoise.vuonode that you need only for
Reptiles.vuo. You can create a folder
called Modules on your
Desktop and place me.crocodile.vuo and
me.tortoise.vuonode in that folder.
A Composition-Local Library is a folder called Modules located in the same folder as a composition. When you have that composition open, the nodes in the Composition-Local Library appear in the Node Library.
If there’s more than one composition in the same folder as Modules, all of those compositions can “see” and make use of the nodes in that Composition-Local Library.
A subcomposition within a Composition-Local Library may contain other nodes that are installed in the same Composition-Local Library. It may also contain nodes that are installed in the User Library or System Library folder.
If you install a subcomposition in a Composition-Local Library and later decide that you want to make the node available to all compositions, you can open the subcomposition and go to .
Uninstalling a node
To uninstall a node, delete or move the node file out of the Library folder in which it’s installed.
To find out where the node is installed, right-click on it in the Node Library and go to .
Be aware that once you’ve uninstalled a node, compositions that contain the node will no longer work.